
New Player Guide
Anomalous made this awesome new player guide for helping you get started including how to get scanners, TUs and DSATs
local wrap = require('rslib').getTextWrapped
local cos, sin, min, max = math.cos, math.sin, math.min, math.max
local print = function(txt, a1, a2, a3, a4, a5, a6, a7, a8, a9, a10, a11, a12)
logMessage(string.format(txt, a1, a2, a3, a4, a5, a6, a7, a8, a9, a10, a11, a12))
end
if not _localization then
_localization = {
['STANDBY'] = {
touch2Launch = [[Click on the screen (with no tools selected) to start.]],
playerName = [[NOVEAN (TYR GUIDE)]],
subTitle = [[GREETINGS %s]],
title = [[Industrial Tutorial - New Player Jumpstart]],
touchMe = [[Click Me!]],
description = [[Step-by-step instructions for building three essential devices for new players: Territory units, the Deep Space Asteroid Tracker (DSAT), and Territory Scanners. ]]
},
['HOME'] = {
playerName = [[]],
title = [[SELECT STAGE OF PROGRESSION]],
subTitle = [[Industrial instructions for new Noveans]],
tooltip = [[Click on a stage above to show instructions.]],
categories = [[STAGES:]],
progress = [[YOUR PROGRESSION:]],
back = [[Return]],
menus = {
{name = 'GETTING\nSTARTED', icon = {path = 'gui/screen_unit/img/decals/icon_talents.png', width = 224, height = 224}, page = 'GETTING\nSTARTED'},
{name = 'MINING,\nREFINING,\nAND\nSMELTING', icon = {path = 'gui/screen_unit/img/decals/icon_mining.png', width = 224, height = 224}, page = 'MINING,\nREFINING,\nAND\nSMELTING'},
{name = 'INDUSTRIAL\nPARTS AND\nASSEMBLY\nPROCESS', icon = {path = 'gui/screen_unit/img/decals/icon_crafting.png', width = 209, height = 244}, page = 'INDUSTRIAL\nPARTS AND\nASSEMBLY\nPROCESS'},
{name = 'ASTEROID\nTRACKER\nAND T2 ORE', icon = {path = 'gui/screen_unit/img/decals/icon_piloting.png', width = 150, height = 150}, page = 'ASTEROID\nTRACKER\nAND T2 ORE'},
{name = 'TERRITORY\nUNITS AND\nSCANNERS', icon = {path = 'gui/screen_unit/img/decals/icon_planet2.png', width = 224, height = 224}, page = 'TERRITORY\nUNITS AND\nSCANNERS'}
}
},
['OBJECTIVES'] = {
separator = ',',
back = [[Back]],
objectivesTitle = [[OBJECTIVES:]],
description = [[DESCRIPTION:]],
subTitle = [[Industrial Tutorial - New Player Jumpstart]],
tooltip = [[Choose an objective to show its details. Be sure to follow these steps in order for the best results!]],
markDone = [[Mark as Complete]],
unmarkDone = [[Mark as Incomplete]],
duIt = [[Let's DU it!]],
reduIt = [[Let's reDU it!]]
},
['GETTING\nSTARTED'] = {
title = [[Getting started]],
objectives = {
{title="How to use this guide:",
desc = [[This tutorial will walk you through all of the steps required to build territory units, a DSAT, and territory scanners. Each of these projects is broken down into smaller, easily managed objectives, allowing you to take smaller steps while tracking your progress.
Please note that this tutorial does not interface with your actions in the game (objectives will not automatically mark themselves as complete as you play). You will need to mark your own objectives complete in order to keep an accurate measure of your progress.
!Important! : Some of the steps listed in this section, "Getting Started", contain recommendations for talents to queue or purchase, as well as items to buy from the market. Neither are required to continue - Please choose which talents and purchases you think will be of best benefit to you!
Pointing your cursor at the top or bottom of a page will cause the text to scroll, if it is too large to see all at once.
When you are ready to proceed, click the 'Mark as Complete' button to complete this objective, and select the next objective on the left: Introduction to Talent Points.]], done = 0},
{title="Introduction to Talent Points",
desc = [[Talents, accessed via F2 or through your 'tab' menu, are specific skills which are trained directly to your avatar over time. They increase your effectiveness in a variety of areas, including effect of piloting elements like engines or brakes, efficiency when refining pure materials from ores, more space in containers that you place, and many more.
If you do not have any talents queued, then 'Talent Points' representing specially prepared yet untrained areas of your brain will accumulate and allow you to invest in or outright buy a talent later. However, this is far less effective and efficient than directly training towards a talent via the queue. You will be able to get more talents faster by keeping your queue active at all times.
When deciding which talents to pursue, there are 3 important considerations:
1: You cannot change your mind and get your points back later once spent,
2: Some talents require others before you can queue the first rank,
3: Higher levels (4 or 5) of talents require an exponentially higher amount of points compared to lower levels (1, 2 or 3).
Because lower levels require so few points, you can get a lot of benefits out of queuing up the first 2 or 3 levels of a talent in a short span of time compared to specializing in the maximum level of one particular talent.
Take care when selecting your talents - specializing can take a very long time, and your choices are permanent! In addition, there are a number of talents which other Noveans can use to help you, which you won't need to train yourself. Most of these talents are called 'Handling Talents'.
If you haven't already, take a moment to familiarize yourself with the Talents Queue (F2), and queue up some talents. The next objective contains some recommendations for talents useful to new players.]], done = 0},
{title="Recommended Talents",
desc = [[Note: It is advisable to read this entire page before allocating talents.
Mining and Inventory:
An invaluable asset to almost any Novean is a long range for their container link. In the Inventory Manager group, queue the 'Primary Container Augmentation' talent, to the 2nd or 3rd level. At level 3, this talent will allow you to use your linked container up to a kilometer away! This will also automatically queue levels of container proficiency, allowing you to store more items in containers that you place (or containers you apply your talents to, using the 'reapply talents to construct' option on the right click menu for a construct you have rights to).
If you have only just started your adventure in Dual Universe, it may be a good idea to invest in some Surface Harvester talents so that you get more resources per rock harvested! This will also increase the resources you get from rocks spawned by Mining Units, and thus can be beneficial in the long term. Please note that the 'advanced' talents in this group require level 4 of the previous talents, which is a significant investment of points - but even level 2 or 3 of the basic talents will make your active mining time go further!
If you want to expand your mining unit operations, you'll need more construct slots. Core Unit Upgrades (located in the Architect group), will allow you to deploy and maintain control of more total constructs, both static and dynamic.
Piloting:
Almost any Novean will benefit from a few basic talents in Piloting. Increasing engine strength allows your ship to handle more weight, while stronger brakes allow you to avoid collisions. Some talents, such as Atmospheric Engine Altitude Efficiency, require a significant investment in other talents before becoming available, and should only be pursued by serious pilots, but others require almost no points for a substantial benefit.
Choose the talents that are right for you, and check out the difference in your ship's stats in the Build Helper or in flight!]], done = 0},
{title="Managing Your Money (Quanta)",
desc = [[When you begin your journey, you will have a little Quanta to spend. This is the universal Novean currency, and even a little could create advantages and opportunities for you as you go about your other objectives.
For instance, you could buy one or two Small Atmospheric Engines at the market to improve the top speed of your speeder. This will allow you to cut down on the time moderate or long-range travel takes around Haven and Alioth, letting you make better use of your time for a relatively low cost.
You could also buy a Small or Medium sized Basic Assembly Line to jumpstart your industrial efforts - though be careful not to spend everything!
Even with only a basic speeder, you can earn Quanta by harvesting surface rocks containing T1 ore (hematite, bauxite, coal, quartz) and selling those minerals at a market. Aphelia will buy the ore at a low price even if no one else needs it, but other Noveans may pay extra if their demand is high enough!
You can also run delivery missions for Aphelia using the Missions Panel (F8). The smallest package can be carried in your nanopack, so you can deliver it on foot (not recommended) or using your starting speeder. You can earn enough money this way to buy stronger engines to modify your speeder to carry the next package size (along with a Small Container), or you can build the parts yourself.
Be sure to keep an eye on how much Quanta you have left - You may need to buy scrap to repair your ship, fuel to get back home, or pay the deposit for a mission, so be sure to save at least 50,000!]], done = 0},
{title="CREDITS",
desc = [[This guide was written by Ivetaea (Anomalous), using more than 2 years of experience and knowledge during the Dual Universe Alpha and Beta, to assist in guiding new players as the game moves forward, and in memory of many players who struggled and persevered through difficult years of testing to create amazing constructs, programs and stories.
Special thanks to: the Dual Universe Development Team for creating the beautiful LUA framework required for this screen unit to function.]], done = 0}
}
},
['MINING,\nREFINING,\nAND\nSMELTING'] = {
title = [[Mining, Refining, and Smelting]],
objectives = {
{title="Assembly Line S: Materials",
desc = [[In order to build any basic industrial machine, we will need a medium assembly line. However, we can't create one without first building the small assembly line (or 'ASL' for short) using our nanocrafter (default hotkey 'K'). In order to build the S ASL, we will first need to acquire some resources.
Mining asteroids using the mining tool, or buying ore from the market using quanta made from missions or challenges are great options - if you have a ship. If not, you'll be relying on the harvest tool to collect surface ore on your Haven tile or unclaimed tiles of other planets.
Collect iron, bauxite, coal and quartz, and use your nanocrafter to refine the ore into pure iron, aluminium, carbon and silicon. Pures can be used to create fuel and some voxel materials, but most industry requires one more processing step before we can actually make parts for elements: Material Products. Collect enough pure iron, bauxite, coal and quarts to produce one batch (75L) each of steel, silumin, and AL-FE alloy.]], done = 0},
{title="Assembly Line S: Crafting ",
desc = [[Now that you have material products, you can nanocraft the required parts for the small ASL. Some parts are more complex and require simpler parts to be made - you can review each part by right-clicking on an item shown in the nanocrafter or market panel and choosing the 'Inspect Item' option. Also note that some recipes will produce more than 1 item in the output, like screws and pipes.
To create your S ASL, you will need to make 2 batches of screws, 2 batches of connectors, 5 power systems, 1 mobile panel S, and 1 reinforced frame S. This could take a while, but you can increase your nanocrafting speed with talents (Mining and Inventory -> Inventory Manager -> Nanocrafter Efficiency). Once you have the parts, begin building the small ASL!]], done = 0},
{title="Assembly Line M: Materials and Parts",
desc = [[Once your S ASL is crafting, you can begin preparing to build its bigger brother, the M ASL. However, most items that are produced by machines, like the M ASL you will build with your smaller one, require items called schematics. These are consumable industrial licenses accessed in the Schematics tab (use your tab menu to find it near the top). Start a batch of "Tier 1 M Element" schematics before you begin - they take time to copy! If you plan to build a territory unit (later in this guide), it is a good idea to queue a schematic for those as well (they take over 5 hours to copy).
In addition, industrial machines require some skill to use, so be sure to visit the Industry page of your Talents and queue up the first level of each assembly line, refining machine, and other industrial machines. Don't worry, the first level doesn't take many points, and having access to each basic machine can be of great benefit even when working with others.
While the schematic is copying, continue gathering materials. You'll need 150 steel, 300 AL-FE alloy, and 75 silumin to build this larger assembler. Once you've gathered these resources, craft 6 batches of screws, 10 batches of connectors, 25 power systems, a mobile panel M, and a reinforced frame M.]], done = 0},
{title="Assembly Line M: Setup and Assembly",
desc = [[With these materials on hand, you are now ready to set up your first simple machine. Place the S ASL on a static construct (like your Haven Outpost), as well as a container. Industrial machines require Links (like invisible pipes) to draw in ingredients and output products. Use the Linking tool while in build mode to draw a link from your Outpost's container hub to the S ASL, then draw a link from the S ASL to a different container for output.
NOTE: Output and input cannot share containers.
With a valid input and output container, all the S ASL needs to produce your medium ASL is a schematic. Access the S ASL and click on Schematic Bank, and drop a copy of your Tier 1 M Element schematics inside. Then, choose the Basic Assembly Line M from available production options, change mode to 'Make 1' and press start. Assembly will begin as soon as all the required parts are put into the input container. This is the same process used for setting up all industry machines.]], done = 0},
{title="Refiner: The Beginning of Automation",
desc = [[With your M ASL constructing, you can begin preparing to build a Refiner! This will allow you to process ore into pures quickly without the use of your nanocrafter, saving you valuable time.
Acquire 150 steel, 150 silumin, and 300 AL-FE alloy, then craft the following:
40 Pipes
30 Screws
100 Connectors
25 Power Systems
1 Chemical Container M
1 Reinforced Frame M
Once your M ASL is complete, place it on your outpost. You can use the same containers as you did for the S ASL for this one (although any container can only support 10 industrial inputs and 10 industrial outputs), or you can harvest a bit more ore and build additional XS containers in your nanocrafter. Once it's ready, insert a schematic (you should have 2 left) into the M ASL bank, select Basic Refiner from available products, and make 1!]], done = 0},
{title="Smelter: Saving Even More Time",
desc = [[With your Refiner in assembly, this may be the last project you need to refine ores in your nanocrafter for, and with completion of the Smelter, you'll be able to offload production of steel, silumin, and AL-FE alloy as well!
Acquire 225 steel and 300 silumin. Then craft the following:
40 Pipe
130 Screws
25 Burners
1 Chemical Container M
1 Reinforced Frame M
Then, use your last schematic to change the ASL M's production to smelter (once your refiner is done), and make 1!]], done = 0},
{title="Additional Materials",
desc = [[Although refiners don't require schematics to refine the basic 4 ores, they will need schematics for higher tier ores, and smelters will require schematics even for basic products. Be sure to keep a batch or two of these copies on hand! We will also require additional Tier 1 Element M schematics to make more machines, as well as a copy of a Tier 1 Element L and one for XL later in the tutorial - these take even longer to copy, so it's best to start early!
Though you now have what is required to produce alloys, there are 2 other types of material products used in production: Plastics and Glass. These are made in the Chemical Industry and Glass Furnace respectively. Though you will benefit most from having additional refiners and smelters, it is a good idea to have at least 2 chemical industries (one for fuel, one for plastic), and one glass furnace for producing some elements.
At this time, continue creating machines until you are comfortable with the level of automation you have. You could have 1 refiner for each T1 ore, so that you don't need to switch the product between runs, or increase the number of steel smelters that you have so that you don't have to wait as long to make large amounts. We will also need at least 1 chemical industry to build our 3 projects later, so create that during this time. It could also be helpful to create additional ASLs so that you can create more elements/machines at the same time!]], done = 0},
}
},
['INDUSTRIAL\nPARTS AND\nASSEMBLY\nPROCESS'] = {
title = [[Industrial Parts and Assembly Process]],
objectives = {
{title="Introduction to Industrial Part Automation",
desc = [[In order to build large objects like the Asteroid Tracker and the Territory Scanner, we will need the largest size assembly line. This element is so large that even some of the parts used to build it can't be made in the nanocrafter. In addition, even with parts we can make in the nanocrafter like Basic Power Systems, the XL ASL will require so many of them that nanocrafting them is going to be really impractical, and we'll want to set up industry to make those for us too.
Previously, we could just put parts we made into a container and feed that direclty into an ASL. This time, we're going to use a few new kinds of machines to make an entire production chain:
Ores > Pures > Products > Simple Parts > Complex Parts > Functional Parts > Final Product.
We already have machines for the first two steps. If you haven't already, draw a link out of an ore input container to your refiners, and a link out of the refiners into a pures container. From that pures container, draw a link to your smelters/chem industries/glass furnaces to make products.]], done = 0},
{title="Simple Parts",
desc = [["Simple Parts" refers both to Intermediary parts (like pipes and screws), and structural parts (like reinforced frames). These two types of parts have one thing in common: they don't require other types of parts to be made, only products.
In order to build the XL ASL, we will first need to build an L ASL. Fortunately, we will be able to tweak the line we build for the L ASL line to build parts for the XL ASL without having to move machines or undo links.
Our first step will be to produce the L size simple parts. Build two basic metalworks industry units - One for producing basic screws, and one for creating a Basic Reinforced Frame L. Also build an electronics industry to produce basic connectors.
Note: Industrial parts do not require any schematics.
Once the metalworks are complete, place them on your static construct, and draw links to them from your product outputs (specifically, the output containers into which your steel is flowing from your smelters). Then draw links out of the metalworks into a new container. Do the same with the electronics industry, drawing a link from your AL-FE alloy output. Set the machines to produce the screws, reinforced frame L, and connectors, and let them run.
Note: It can be helpful to set your machines to 'maintain' a level of a product so that only enough of a part is produced to supply an ASL, when it is ready.]], done = 0},
{title="Complex Parts",
desc = [[Complex Parts and Exceptional Parts are made from a combination of simple parts and products. To build the L ASL, we will need 125 basic power systems, a complex part requiring connectors (simple part) and AL-FE alloy (product).
Build 1-3 electronics industries (depending on how quickly you want to produce power systems), and connect them to draw connectors from your earlier electronics industry, as well as from your AL-FE output. Then draw links out of the power system electronics industries into a different output container.
From this point on, we've had enough practice linking machines to know how it's done. Feel free to experiment with where to send your parts - You can always use individual containers for everything to keep things simple, but you can save space and containers if you're clever.]], done = 0},
{title="Functional Parts",
desc = [[Functional parts, like the Mobile Panel L we need to complete our L ASL, require products, intermediary parts, and complex parts to build. Fortunately, only one is required when building most elements, and non-element products often require no functional part at all.
Build another metalworks industry and set it to Mobile Panel L. Even though we could re-use our previous metalworks for this, it would mean linking to different containers, and if we wanted to make another ASL, we would have to stop what we are doing and change the configuration each and every time. It is a better idea in the long term to keep entire industrial lines intact so that all you need to do to create another copy of the product is insert a schematic and drop the ore into the container at the beginning of the production chain.
Once the mobile panel is complete, set up an M ASL to draw basic screws, basic power systems, the mobile panel, and the reinforced frame from your various output containers. Then supply a schematic and begin building the L ASL.]], done = 0},
{title="XL Assembly Line",
desc = [[Once your L ASL is complete, you will be able to use it to produce an XL ASL. You can create the parts required while you are waiting in order to save time.
At this point you can either tweak your existing line to make XL mobile panels instead of L ones, and XL frames instead of L ones. The materials used are the same, and the power systems and screws will increase in required amount, but will not be a different part, so you can leave those lines be.
Alternatively, you can build an entire new industrial line specifically for this larger ASL type (Do this if you want to keep on producing both types of ASLs to sell on the market or give them to friends or org members). Only 1 XL ASL is required to complete the projects in this program.
Once your XL ASL is building, you can proceed to the next section to begin building the Deep Space Asteroid Tracker!]], done = 0}
}
},
['ASTEROID\nTRACKER\nAND T2 ORE'] = {
title = [[Deep Space Asteroid Tracker (DSAT)]],
objectives = {
{title="DSAT: Overview",
desc = [[By this time you should be somewhat familiar with how automation works, and how machines link to containers in a chain to enable other machines to work. From this point on, instead of giving step by step instructions, I'll just list some helpful information and objectives.]], done = 0},
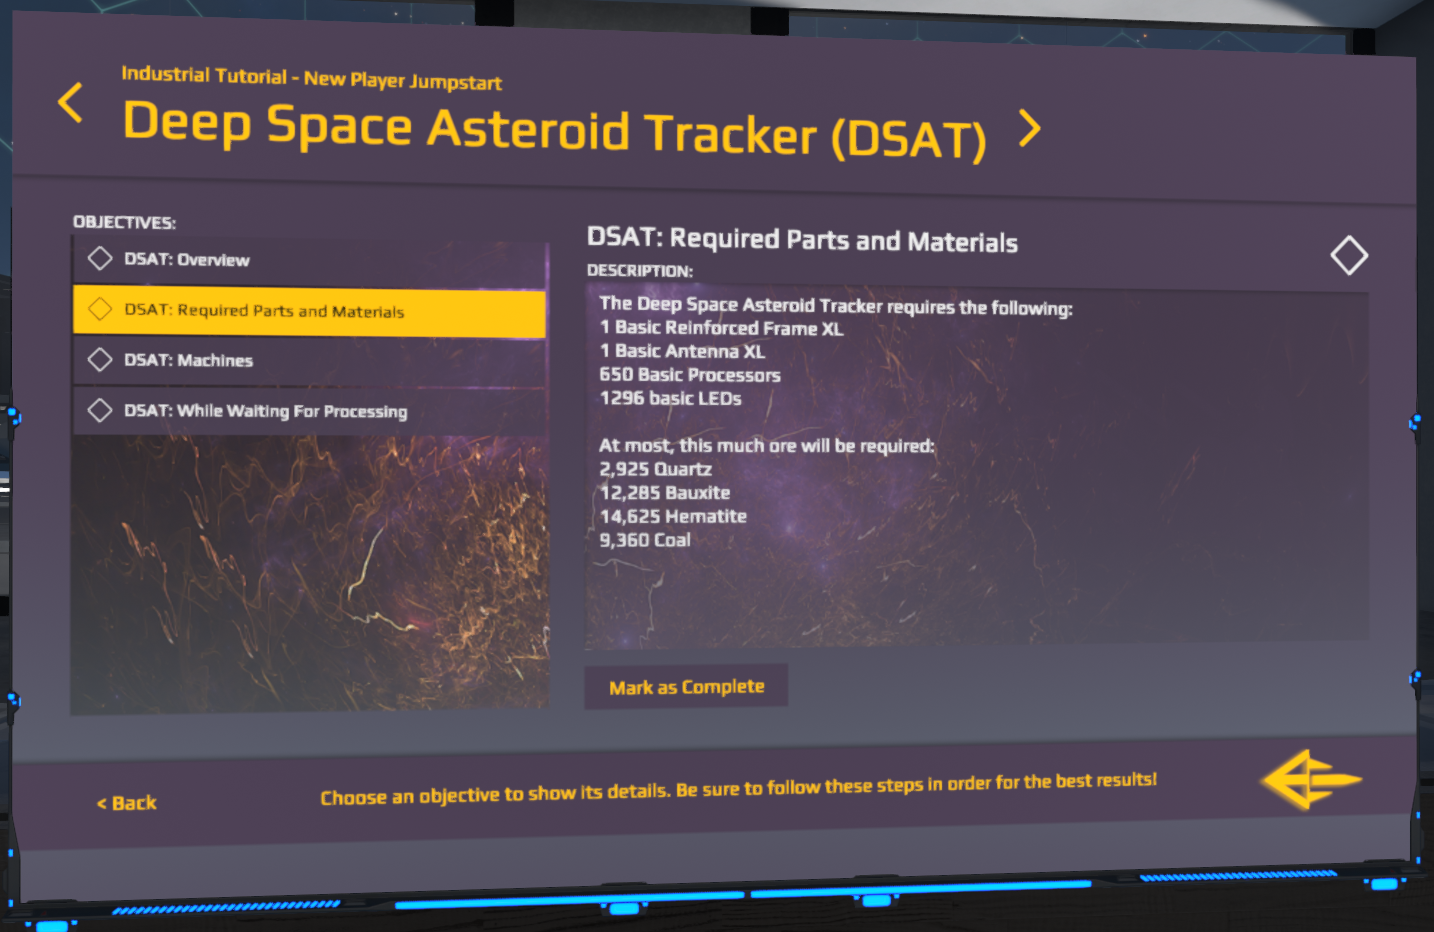
{title="DSAT: Required Parts and Materials",
desc = [[The Deep Space Asteroid Tracker requires the following:
1 Basic Reinforced Frame XL
1 Basic Antenna XL
650 Basic Processors
1296 basic LEDs
At most, this much ore will be required:
2,925 Quartz
12,285 Bauxite
14,625 Hematite
9,360 Coal]], done = 0},
{title="DSAT: Machines",
desc = [[Basic Reinforced frames of all sizes are built in a metalworks industry.
Antennas (functional part) are made in an electronics industry.
Basic Processors are made in electronics industries. You may want to build 2 or 3 instead of just 1, to speed things up.
Basic LEDs are made in a glass furnace, and produce quickly.
Note: In general when producing elements, build 2 or 3 machines for complex parts instead of just 1. It usually takes much longer for a large number of complex parts to complete than a single functional or structural part.]], done = 0},
{title="DSAT: While Waiting For Processing",
desc = [[Most large objects, such as the DSAT, take a long time to build even after all the parts are ready. During this waiting period, you can either jump ahead to the next section to prepare special resources, or make money selling ore, machines or flying missions to buy a ship that can carry your DSAT into space (if you want to find new asteroids yourself).
A ship carrying a heavy piece of equipment like a DSAT could use more powerful engines than you will have access to in your outpost or on your speeder. You can set up a line for large atmospheric and space engines to prepare for this, or just to sell them on the market. The DSAT will enable you to mine asteroids instead of gathering surface rocks, which is more comfortable and effective, so you will be able to supply these new lines more easily when it is complete.
If you plan to mine asteroids to gather Tier 2 ores for the next 2 projects, then prepare a ship that can haul a decent amount of weight (at least 300+ tons) during this time, and use the DSAT to mine limestone, malachite and chromite. If you want to postpone use of the DSAT and go straight into territory units, then fly any ship to Thades and collect surface chromite rocks until you have at least 5000L (you may need an XS or S container on your ship to carry it all back to your outpost).]], done = 0}
}
},
['TERRITORY\nUNITS AND\nSCANNERS'] = {
title = [[Territory Units and Territory Scanners]],
objectives = {
{title="Introduction to Higher Tier Manufacturing",
desc = [[To build territory units, we will need to acquire some rarer types of ore, specifically Limestone, Malachite and Chromite. Limestone and Malachite can be found (though less commonly) on the surface of Alioth, but Chromite cannot be found without travel to another planet (Thades or Jago). If you haven't already, queue a schematic for territory units now (5 1/2 hours copy time).
This higher tier ore will require schematics in the refiner, unlike the basic ore we have worked with. However, we will still be able to use basic refiners to process this ore, because all industry units have one tier of overlap. A basic (T1) refiner can refine both T1 and T2. A T2 refiner can refine T1, T2 and T3 ores (One level down, same level, and one level above). This will allow you to build T2 machines using T1 machines. However, the higher a tier the product/part/element, the more difficult it is to procure the ore, and the longer the total manufacturing time.
Collect 5000 chromite from Thades or Jago, or from deep space asteroids (or buy it on the market). You can also get Limestone and Malachite from the market, but you can also just surface harvest on Alioth, which is conveniently close by.]], done = 0},
{title="Territory Unit: Materials",
desc = [[At most, to produce the parts for a territory unit you will need:
1170 Hematite
1170 Bauxite
585 Coal
585 Quartz
325 Limestone
455 Malachite
325 Chromite
Note: Higher tier parts usually require a greater variety of products to produce. Uncommon screws will require both basic steel as well as stainless steel.]], done = 0},
{title="Territory Unit: Deployment",
desc = [[Once your territory unit is complete, you will need to find an unclaimed tile on a non-sanctuary celestial body, and gather 500,000 quanta for the deployment fee. With both of these in hand, you can claim a tile for your own, allowing you to use mining units there and build static constructs.
You are now armed with the means to expand your influence in the Helios system! However, in order to find the best tiles to place mining units on, you will probably want to have a territory scanner! This device (after a 15 minute processing period) can tell you exactly how much mining potential each tile has. Proceed to the next section to begin the last project.]], done = 0},
{title="Territory Scanner: Materials",
desc = [[At most, to produce the parts for a territory scanner you will need:
11,700 Hematite
15,210 Bauxite
8,775 Coal
11,050 Limestone
5,980 Malachite
4,810 Chromite
Note: The Territory Scanner is very large and heavy. Ensure your ship can handle the weight!]], done = 0},
{title="Territory Scanner: Deployment",
desc = [[Once your territory scanner is complete, you'll need to attach it to a ship to move it around and activate it.
In order to function, territory units must be activated on a ship that has landed and come to a complete halt (you must leave the pilot's seat to ensure this). 15 minutes later, the scanner will produce a data item that shows exactly what ores can be mined using automated mining units.
You've now learned the basics: Get out there and expand your industrial empire! Alternatively, visit the Institute or Novean-made museums, information centers, or cities to find other ways to explore the stars! Congratulations, Novean!]], done = 0},
}
},
}
end
if not _init then
function getEllipsis(font,text,maxWidth)
local ellipisWidth=getTextBounds(font,'...')
for i=1,#text do
local line=getTextBounds(font,text:sub(1,i)) + ellipisWidth
if line > maxWidth then
return text:sub(1,i-1)..'...'
end
end
return text
end
function getFormat(number,sep)
local i,j,minus,int,fraction=tostring(number):find('([-]?)(%d+)([.]?%d*)')
int=int:reverse():gsub("(%d%d%d)","%1"..sep)
return minus .. int:reverse():gsub("^.","") .. fraction
end
--#################################
function Initialize()
if _init then return end
if not _menu then
logMessage("WARNING : No '_menu' globals defined,set as default 'STANDBY'.")
_menu='STANDBY'
_page=nil
end
_loc={}
for key,dict in pairs(_localization) do
if key == _menu or key == _page then
for str,field in pairs(dict) do
_loc[str]=field
end
end
end
if _menu == 'HOME' then
_tooltip=_loc.tooltip
_selected=0
elseif _menu == 'OBJECTIVES' then
_selected=1
_scrollLeft=0
_scrollRight=0
end
_init=true
end
--#################################
function Compute()
local rx,ry=getResolution()
local mx,my=getCursor()
local debug=createLayer()
local dt=getDeltaTime()
local released=getCursorReleased()
setDefaultStrokeColor( debug,Shape_Line,1,0,0,0.75)
requestAnimationFrame(1)
if _menu == 'STANDBY' then
if released then
_menu='HOME'
_page=nil
_init=false
end
requestAnimationFrame(12)
elseif _menu == 'HOME' then
local small=loadFont('Play',14)
_tooltip=_loc.tooltip
_selected=0
_hover=0
_page=nil
if my>152.5 and my<427.5 then
local menusSize=#_loc.menus
for k,p in pairs(_loc.menus) do
local x=rx/2 - 119*(menusSize-1)/2 + (k-1)*119
if (mx>x -57.5 and mx530 and my < 560 then
local backWidth=getTextBounds(small,'< '.._loc.back)
backWidth=min( 240,backWidth)+32
if (mx > 39 and mx < 39+backWidth) then
_hover=-3
if released then
_menu='STANDBY'
_page=nil
_init=false
end
end
end
requestAnimationFrame(1)
elseif _menu == 'OBJECTIVES' then
_hover=0
local o=_loc.objectives[_selected]
local small=loadFont('Play',14)
local big=loadFont('Play',38)
local count=#_loc.objectives
if my>46 and my<78 then
local titleWidth=getTextBounds( big,_loc.title)
local subtitleWidth=getTextBounds( small,_loc.subTitle)
local x=max(subtitleWidth,titleWidth)+84
local id=1
for k,m in pairs(_localization['HOME'].menus) do
if m.page == _page then
id=k
break
end
end
if mx>22 and mx<54 and released then
_menu='OBJECTIVES'
_page=_localization['HOME'].menus[id == 1 and #_localization['HOME'].menus or id - 1].page
_init=false
elseif mx>x and mx41 and mx<322) and (my>150 and my<486) then
if count > 9 then
if my < 250 then
_scrollLeft=_scrollLeft- 100.0*dt*(250-my)/100
elseif my > 386 then
_scrollLeft=_scrollLeft- 100.0*dt*(386-my)/100
end
_scrollLeft=_scrollLeft < 0 and 0 or _scrollLeft > count*35 -332 and count*35 -332 or _scrollLeft
end
for k,o in pairs(_loc.objectives) do
if 153.5+ k*35 -_scrollLeft > 118 then
if (mx>41 and mx<322) and (my>153.5 + (k-1)*35 -_scrollLeft and my<153.5 + (k-1)*35 + 32 -_scrollLeft) then
_hover=k
if released then
_selected=k
end
end
end
if 153.5+ k*35 -_scrollLeft > 522 then break end
end
elseif (mx>391 and mx<986) and (my>179 and my<445) then
if my < 279 then
_scrollRight=_scrollRight- 100.0*dt*(279-my)/100
elseif my > 345 then
_scrollRight=_scrollRight- 100.0*dt*(345-my)/100
end
elseif my>456 and my<486 then
local doneWidth=getTextBounds(small,o.done == 1 and _loc.unmarkDone or _loc.markDone)
doneWidth=min( 240,doneWidth)+32
local duitWidth=getTextBounds(small,o.done == 1 and _loc.reduIt or _loc.duIt)
duitWidth=min( 240,duitWidth)+32
if (mx > 392 and mx < 392+doneWidth) then
_hover=-1
if released then
o.done=o.done == 1 and 0 or 1
setOutput(string.format('{objective="%s",done="%d"}',o.trigger,o.done))
end
elseif (mx > 986-duitWidth and mx < 986) then
_hover=-2
if released then
local output = string.format('{trigger="%s"}',o.trigger or 'nil')
logMessage('DEBUG : PRINT TRRIGER IN OUTPUT "'.. output.. '"')
setOutput(output)
end
end
elseif my >530 and my < 560 then
local backWidth=getTextBounds(small,'< '.._loc.back)
backWidth=min( 240,backWidth)+32
if (mx > 39 and mx < 39+backWidth) then
_hover=-3
if released then
_menu='HOME'
_page=nil
_init=false
end
end
end
requestAnimationFrame(1)
end
end
--#################################
function Render()
local rx,ry=getResolution()
local mx,my=getCursor()
local time=getTime()
local rslib = require('rslib')
rslib.drawQuickImage("assets.prod.novaquark.com/74927/f3c8301c-b890-47a6-a04b-afd516a5e85f.png")
setBackgroundColor( 51/255,51/255,51/255)
if _menu == 'STANDBY' then
local rx2=rx/2
local back=createLayer()
local front=createLayer()
local fore=createLayer()
local mini=loadFont('Play',16)
local small=loadFont('Play',18)
local smallBold=loadFont('Play-Bold',18)
local medium=loadFont('Play',20)
local big=loadFont('Play',38)
local iconNoveanTech=loadImage('assets.prod.novaquark.com/74927/c5a1b557-f193-4bfa-a5b6-2f853c4641aa.png')
local iconFlex=loadImage('gui/screen_unit/img/decals/icon_crafting.png')
--Default style
setNextFillColor( front,28/255,20/255,33/255,0.75)
addImage( front,iconFlex,30,150,360,360)
setDefaultFillColor( back,Shape_Circle,0,0,0,0)
setDefaultStrokeColor( back,Shape_Line,0,0,0,0.5)
setDefaultShadow( back,Shape_Line,6,0,0,0,0.5)
setDefaultFillColor( back,Shape_Text,233/255,163/255,1/255,1)
setDefaultFillColor( front,Shape_Box,28/255,20/255,33/255,1)
setDefaultFillColor( front,Shape_Text,254/255,254/255,254/255,1)
--Header
addLine( back,0,112,rx,112)
addBox( front,0,12,rx,100)
setNextFillColor( front,233/255,163/255,1/255,1)
addText( front,medium,string.format(_loc.subTitle,_loc.playerName),44,45)
addText( front,big,_loc.title,44,85)
--Body
for k=1,2 do
local t=3*(time+0.25*k)
setNextStrokeWidth( back,4*(-sin(t)))
setNextStrokeColor( back,233/255,163/255,1/255,sin(t))
addCircle( back,rx2,300,30+(1-cos(t))*40)
end
setNextFillColor( back,233/255,163/255,1/255,1)
setNextTextAlign( back,AlignH_Center,AlignV_Middle)
addText( back,medium,_loc.touchMe,rx2,300)
lines=wrap(small,_loc.description,340)
for k,l in pairs(lines) do
local y=473+(k-1 -(#lines-1)/2)*20
setNextTextAlign( back,AlignH_Right,AlignV_Baseline)
addText( back,small,l,981,y)
end
--Foot
setNextTextAlign( front,AlignH_Center,AlignV_Baseline)
addText( front,mini,_loc.touch2Launch,rx2,550)
--
setNextStrokeColor( back,46/255,59/255,65/255,0.5)
setNextShadow( back,340,46/255,59/255,65/255,0.5)
addLine( back,0,524,rx,524)
addLine( back,0,518,rx,518)
addBox( front,0,518,rx,58)
setNextFillColor( fore,253/255,253/255,253/255,1)
addImage( fore,iconNoveanTech,890,521,98,55)
--#################################
return
elseif _menu == 'HOME' then
local rx2=rx/2
local back=createLayer()
local front=createLayer()
local fore=createLayer()
local over=createLayer()
local mini=loadFont('Play',12)
local small=loadFont('Play',14)
local smallBold=loadFont('Play-Bold',18)
local big=loadFont('Play',38)
local iconNoveanTech=loadImage('assets.prod.novaquark.com/74927/c5a1b557-f193-4bfa-a5b6-2f853c4641aa.png')
local iconTrophee=loadImage('gui/screen_unit/img/decals/icon_trophee.png')
setBackgroundColor( 51/255,51/255,51/255)
setDefaultFillColor( back,Shape_BoxRounded,28/255,20/255,33/255,0.75)
setDefaultFillColor( back,Shape_Text,253/255,253/255,253/255,1)
setDefaultStrokeColor( back,Shape_Line,0,0,0,0.5)
setDefaultShadow( back,Shape_Line,6,0,0,0,0.5)
setDefaultFillColor( front,Shape_Box,28/255,20/255,33/255,1)
setDefaultFillColor( front,Shape_BoxRounded,233/255,163/255,1/255,1)
setDefaultFillColor( front,Shape_Image,253/255,253/255,253/255,1)
setDefaultFillColor( front,Shape_Text,0,0,0,1)
setDefaultFillColor( fore,Shape_Text,254/255,254/255,254/255,1)
setDefaultFillColor( fore,Shape_Image,0,0,0,1)
setDefaultFillColor( over,Shape_Image,233/255,163/255,1/255,1)
--Header
addLine( back,0,112,rx,112)
addBox( front,0,12,rx,100)
setNextFillColor( front,233/255,163/255,1/255,1)
addText( front,small,_loc.subTitle,44,45)
addText( fore,big,_loc.title,44,85)
--Body
addText( back,mini,_loc.categories,40,148)
addText( back,mini,_loc.progress,40,447)
for k,p in pairs(_loc.menus) do
local lines=wrap(smallBold,p.name,130)
local x,y=rx2 - 119*(#_loc.menus-1)/2 + (k-1)*119,290
local img,imgW,imgH=loadImage(p.icon.path),p.icon.width,p.icon.height
local imgScale=imgW <= imgH and 72/imgH or 72/imgW
local layBack=_hover == k and front or back
local layImg=_hover == k and fore or front
local layTroph=_hover == k and fore or over
addBoxRounded( layBack,x -57.5,y -137.5,115,275,0)
addBoxRounded( layBack,x -57.5,452,115,23,0)
addImage( layImg,img,x -(imgW*imgScale)/2,y -(imgH*imgScale)/2,imgW*imgScale,imgH*imgScale)
--Compute progress ratio
local ratio=0
if _localization[p.page] and _localization[p.page].objectives then
for i,o in pairs(_localization[p.page].objectives) do
ratio=ratio + o.done
end
ratio=ratio/#_localization[p.page].objectives
end
setNextFillColor( fore,33/255,40/255,48/255,1)
addBox( fore,x -42,458,84,11,0)
setNextFillColor( fore,233/255,163/255,1/255,1)
addBox( fore,x -40,460,80*ratio,7,0)
if ratio >= 1.0 then
addImage( layTroph,iconTrophee,x-17,370,34,34)
end
for i,line in ipairs(lines) do
setNextTextAlign( layBack,AlignH_Center,AlignV_Baseline)
addText( layBack,smallBold,line,x,186 + 20*(i-1))
end
end
--Gradient
setNextStrokeColor( back,46/255,59/255,65/255,0.5)
setNextShadow( back,340,46/255,59/255,65/255,0.5)
addLine( back,0,524,rx,524)
--Foot
--Back button
local btnText ='< '.._loc.back
local w=getTextBounds(small,btnText)
w=min( 240,w)+32
if _hover == -3 then
setNextFillColor(fore,100/255,73/255,118/255,1)
else
setNextFillColor(fore,28/255,20/255,33/255,0.85)
end
addBox(fore,39,530,w,30)
if _hover == -3 then
setNextFillColor( fore,244/255,244/255,244/255,1)
end
setNextTextAlign(fore,AlignH_Center,AlignV_Middle)
addText(fore,small,getEllipsis( small,btnText,w),39+w*0.5,545)
--Tooltip
setNextTextAlign( fore,AlignH_Center,AlignV_Baseline)
addText( fore,small,_tooltip,rx/2,550)
setNextStrokeColor( back,0,0,0,0.5)
setNextShadow( back,6,0,0,0,0.5)
addLine( back,0,518,rx,518)
addBox( front,0,518,rx,58)
setNextFillColor( fore,253/255,253/255,253/255,1)
addImage( fore,iconNoveanTech,890,521,98,55)
--noveantech numbers default 890,520,98,44
--#################################
return
elseif _menu == 'OBJECTIVES' then
local mx,my=getCursor()
local under=createLayer()
local back=createLayer()
local ground=createLayer()
local front=createLayer()
local fore=createLayer()
local over=createLayer()
local mini=loadFont('Play',12)
local small=loadFont('Play',14)
local smallBold=loadFont('Play-Bold',18)
local medium=loadFont('Play',20)
local big=loadFont('Play',38)
local iconNoveanTech=loadImage('assets.prod.novaquark.com/74927/c5a1b557-f193-4bfa-a5b6-2f853c4641aa.png')
local iconCheck=loadImage('gui/screen_unit/img/decals/icon_check.png')
local iconArrow=loadImage('gui/screen_unit/img/decals/icon_arrow.png')
local iconUncheck=loadImage('gui/screen_unit/img/decals/icon_uncheck.png')
local imgCateg={path='',width=224,height=224}
for k,m in pairs(_localization['HOME'].menus) do
if m.page == _page then
imgCateg=m.icon
break
end
end
--Default style
setBackgroundColor( 51/255,51/255,51/255,1)
setDefaultFillColor( under,Shape_Box,28/255,20/255,33/255,0.85)
setDefaultStrokeWidth( back,Shape_Line,0)
setDefaultStrokeColor( back,Shape_Line,0,0,0,0.5)
setDefaultShadow( back,Shape_Line,6,0,0,0,0.5)
setDefaultFillColor( back,Shape_Text,242/255,242/255,242/255,1)
setDefaultFillColor( ground,Shape_Box,28/255,20/255,33/255,1)
setDefaultStrokeColor( ground,Shape_Line,0,0,0,0.5)
setDefaultShadow( ground,Shape_Line,6,0,0,0,0.5)
setDefaultFillColor( ground,Shape_Text,254/255,254/255,254/255,1)
setDefaultFillColor( front,Shape_Box,28/255,20/255,33/255,1)
setDefaultFillColor( front,Shape_Text,233/255,163/255,1/255,1)
setDefaultFillColor( fore,Shape_Box,28/255,20/255,33/255,1)
setDefaultFillColor( fore,Shape_Text,233/255,163/255,1/255,1)
setDefaultFillColor( fore,Shape_Image,233/255,163/255,1/255,1)
--Header
addLine( ground,0,112,rx,112)
addBox( front,0,12,rx,100)
setNextFillColor( front,233/255,163/255,1/255,1)
setNextTextAlign( front,AlignH_Left,AlignV_Baseline)
addText( front,small,_loc.subTitle,72,45)
setNextTextAlign( front,AlignH_Left,AlignV_Baseline)
addText( front,big,_loc.title,72,85)
addImage(fore,iconArrow,22,46,32,32)
local titleWidth=getTextBounds( big,_loc.title)
local subtitleWidth=getTextBounds( small,_loc.subTitle)
setNextRotation( fore,math.rad(180))
addImage(fore,iconArrow,max(subtitleWidth,titleWidth)+84,46,32,32)
--Background layer
setNextFillColor( ground,28/255,20/255,33/255,1)
addBox( ground,0,0,rx,152.5)
addBox( ground,0,150.5,38,336)
addBox( ground,39,151,326,1)
addBox( ground,367,152.5,656,27)
addBox( ground,367,179.5,24,265)
addBox( ground,986,179.5,38,265)
addBox( ground,367,444.5,656,318.5)
addBox( ground,0,486.5,rx,89.5)
addBox( ground,0,ry-40,rx,80)
setNextFillColor( ground,28/255,20/255,33/255,1)
addBox( ground,39,485,326,1)
setNextStrokeColor( ground,46/255,59/255,65/255,0.5)
setNextShadow( ground,340,46/255,59/255,65/255,0.5)
addLine( ground,0,524,rx,524)
--List of objectives
local count=#_loc.objectives
local w,maxH=322,count*35
if count > 9 then
setNextFillColor( under,0,0,0,1)
addBox( under,357,153.5,6,330)
setNextFillColor( fore,250/255,250/255,250/255,1)
addBox( fore,357,153.5 + _scrollLeft/maxH*330,6,330/maxH * 330)
w=313
end
addText( ground,mini,_loc.objectivesTitle,40,148)
if mx > 39 and mx < 322 then
if my < 250 and _scrollLeft > 1 then
setNextStrokeColor( back,233/255,163/255,1/255,0.5)
setNextShadow( back,30,233/255,163/255,1/255,0.5)
addLine( back,139,151,265,151)
elseif my > 386 and _scrollLeft < maxH-333 then
setNextStrokeColor( back,233/255,163/255,1/255,0.5)
setNextShadow( back,30,233/255,163/255,1/255,0.5)
addLine( back,139,486,265,486)
end
end
for k,o in pairs(_loc.objectives) do
if 153.5+ k*35 -_scrollLeft > 118 then
if _hover == k then
setNextFillColor( under,100/255,73/255,118/255,1)
setNextFillColor( back,244/255,244/255,244/255,1)
elseif _selected == k then
setNextFillColor( under,233/255,163/255,1/255,1)
setNextFillColor( back,0,0,0,1)
end
addBox( under,41,153.5 + (k-1)*35 - _scrollLeft,w,32)
setNextTextAlign( back,AlignH_Left,AlignV_Middle)
addText( back,mini,getEllipsis(mini,o.title,w-47),73.5,169 + (k-1)*35 - _scrollLeft)
if o.done == 1 then
if _hover == k then
setNextFillColor( back,233/255,163/255,1/255,1)
elseif _selected == k then
setNextFillColor( back,0,0,0,1)
else
setNextFillColor( back,233/255,163/255,1/255,1)
end
else
if _hover == k then
setNextFillColor( back,244/255,244/255,244/255,1)
elseif _selected == k then
setNextFillColor( back,0,0,0,1)
else
setNextFillColor( back,242/255,242/255,242/255,1)
end
end
addImage( back,o.done == 1 and iconCheck or iconUncheck,49,169 + (k-1)*35 - 9 - _scrollLeft,18,18)
end
if 153.5+ k*35 -_scrollLeft > 522 then break end
end
-- Description and buttons
setNextFillColor(under,28/255,20/255,33/255,0.75)
addBox(under,391,179.5,595,265)
local img,imgW,imgH=loadImage(imgCateg.path),imgCateg.width,imgCateg.height
local imgScale=imgW <= imgH and 196/imgH or 196/imgW
setNextFillColor(front,28/255,20/255,33/255,0.10)
addImage( front,img,960 -(imgW*imgScale),312 -(imgH*imgScale)/2,imgW*imgScale,imgH*imgScale)
addLine( back,391,179,986,179)
addLine( back,390,179,390,444)
addText( ground,mini,_loc.description,393,176)
local o=_loc.objectives[_selected]
setNextFillColor( ground,1,1,1,1)
addText( ground,medium,getEllipsis(medium,o.title,550),393,154)
if o.done == 1 then
setNextFillColor( front,233/255,163/255,1/255,1)
else
setNextFillColor( front,242/255,242/255,242/255,1)
end
addImage( front,o.done == 1 and iconCheck or iconUncheck,954,136,32,32)
local lines=wrap(small,o.desc,580)
local w,maxH=580,#lines*17
if maxH > 265 then
w=566
lines=wrap(small,o.desc,566)
maxH=#lines*17
setNextFillColor( under,0,0,0,0.5)
addBox( under,977,182.5,6,259)
setNextFillColor( fore,28/255,20/255,33/255,1)
addBox( fore,977,182.5 + _scrollRight/maxH*255,6,255/maxH * 255)
_scrollRight=_scrollRight < 0 and 0 or _scrollRight > maxH -255 and maxH -255 or _scrollRight
else
_scrollRight=0
end
if mx > 391 and mx < 986 then
if my < 279 and _scrollRight > 1 then
setNextStrokeColor( back,233/255,163/255,1/255,0.5)
setNextShadow( back,30,233/255,163/255,1/255,0.5)
addLine( back,491,179,886,179)
elseif my > 345 and _scrollRight < maxH-266 then
setNextStrokeColor( back,233/255,163/255,1/255,0.5)
setNextShadow( back,30,233/255,163/255,1/255,0.5)
addLine( back,491,445,886,445)
end
end
for k,line in pairs(lines) do
local y=200+ k*17 -_scrollRight
if y > 194 then
addText(under,small,line,402,y-17)
end
if y > 456 then break end
end
--Mark button
local btnText=o.done == 1 and _loc.unmarkDone or _loc.markDone
local w=getTextBounds(small,btnText)
w=min( 240,w)+32
if _hover == -1 then
setNextFillColor(front,100/255,73/255,118/255,1)
else
setNextFillColor(front,28/255,20/255,33/255,0.85)
end
addBox(front,392,456,w,30)
if _hover == -1 then
setNextFillColor( front,244/255,244/255,244/255,1)
end
setNextTextAlign(front,AlignH_Center,AlignV_Middle)
addText(front,small,getEllipsis( small,btnText,w),392+w*0.5,471)
--Du it button
--local btnText=o.done == 1 and _loc.reduIt or _loc.duIt
--local w=getTextBounds(small,btnText)
--w=min( 240,w)+32
--setNextFillColor( front,233/255,163/255,1/255,1)
--addBox(front,986 -w,456,w,30)
--setNextFillColor(front,0,0,0,1)
--setNextTextAlign(front,AlignH_Center,AlignV_Middle)
--addText(front,small,getEllipsis( small,btnText,w),986 - w*0.5,471)
--Foot
--Back button
local btnText ='< '.._loc.back
local w=getTextBounds(small,btnText)
w=min( 240,w)+32
if _hover == -3 then
setNextFillColor(fore,100/255,73/255,118/255,1)
else
setNextFillColor(fore,28/255,20/255,33/255,0.85)
end
addBox(fore,39,530,w,30)
if _hover == -3 then
setNextFillColor( fore,244/255,244/255,244/255,1)
end
setNextTextAlign(fore,AlignH_Center,AlignV_Middle)
addText(fore,small,getEllipsis( small,btnText,w),39+w*0.5,545)
--Tooltip
setNextTextAlign( front,AlignH_Center,AlignV_Baseline)
addText( front,small,_loc.tooltip,rx/2,550)
addLine( ground,0,518,rx,518)
addBox( front,0,518,rx,58)
setNextFillColor( fore,253/255,253/255,253/255,1)
addImage( fore,iconNoveanTech,890,521,98,55)
--#################################
return
end
end
end
Initialize()
Render()
Compute()